Over the years I’ve built basses on and off. I’ve also experimented with custom electronics, built preamps, and created some DSP algorithms targeted towards bass guitar. Recently, I’ve been spending much more time thinking about the physical aspects of the instrument. It’s taken a life of it’s own after I built the first Ergo/Travel bass shown below – it has led to rethinking a number of design aspects of bass guitar, it seems there are many areas where there is some room for improvement. See below.
If you have any reaction to what I’m doing, please contact me with comments or ideas. Even if the feedback is “I really don’t like this”, it is still useful and very much appreciated as long as you say why. And if you are local to the Phoenix Metro Area, I would be happy to get in touch in person if I can learn something from the experience or you are interested in seeing what I’m doing up close. If some of the results of this process end up being of interest to enough players to think about how to create products that would be available to more players, that would be wonderful. But for right now, the important thing is to concentrate on the ideas.
The Ergo/Travel Bass
Latest Version
Check out this YouTube video about my latest build:
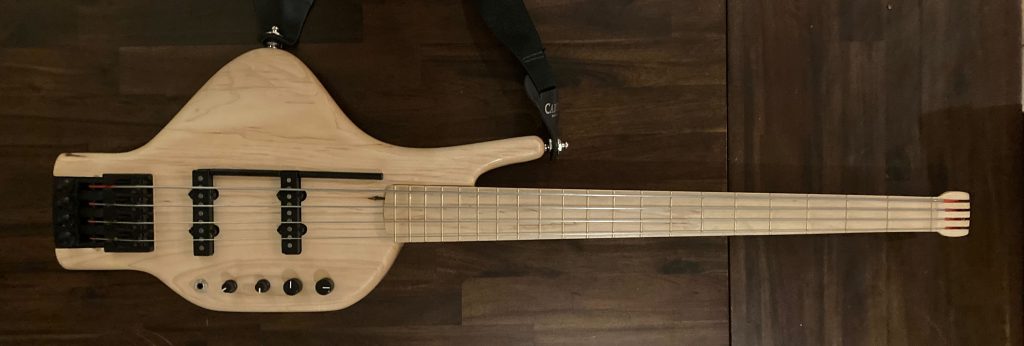
This latest version is as short as a Fender Stratocaster, so it fits in a Stratocaster gig bag. I accomplished this by designing a completely unique tuning assembly, more on this in sections below. Also, this bass weighs a mere 5.4 lbs, compared to 8.5 to 9.5 lbs for a standard Fender Jazz Bass.
In all other respects it is similar to my earlier Ergo/Travel basses, so all the following material below still applies to this new version

Ergo Bass

Traditional Bass

In creating the Ergo/Travel bass concept. I had two primary goals. First, I wanted to build a bass that easily could be put in the overhead compartment of ANY airplane with zero hassle. Second, I wanted to experiment with a fairly radical change in playing position, which was inspired by dabbling in playing the upright bass for a few years.
To support both goals, I started with a bolt on headless design. This means the neck can be removed in minutes and put in a protective sleeve which goes in the overheard compartment, without the headstock it’s no bigger than a cane. The body will fit in a small backpack along with other things like a laptop etc. I’ve taken it on a plane and is zero hassle.
To support the ergonomic goals, I went a step beyond the headless construction and avoided using a metal truss rod, to create an ultralight neck. Then I modified the body shape and changed the rear strap attachment point. The playing position modifications were more successful than I imagined. I don’t have hugely long fingers like many bass players, so the advantages have been even more noticeable in my case.
Advantages:
- Much more ergonomic playing position (in my opinion).
- Overall lighter weight
- I find it easier to memorize the position of the hand on the neck with a more upright neck, probably because it is nearer to the body.
- You don’t have to worry about bonking someone with the headstock on a crowded stage or in a cramped rehearsal space.
- It will fit in most electric guitar gig bags.
The new tuning assembly:
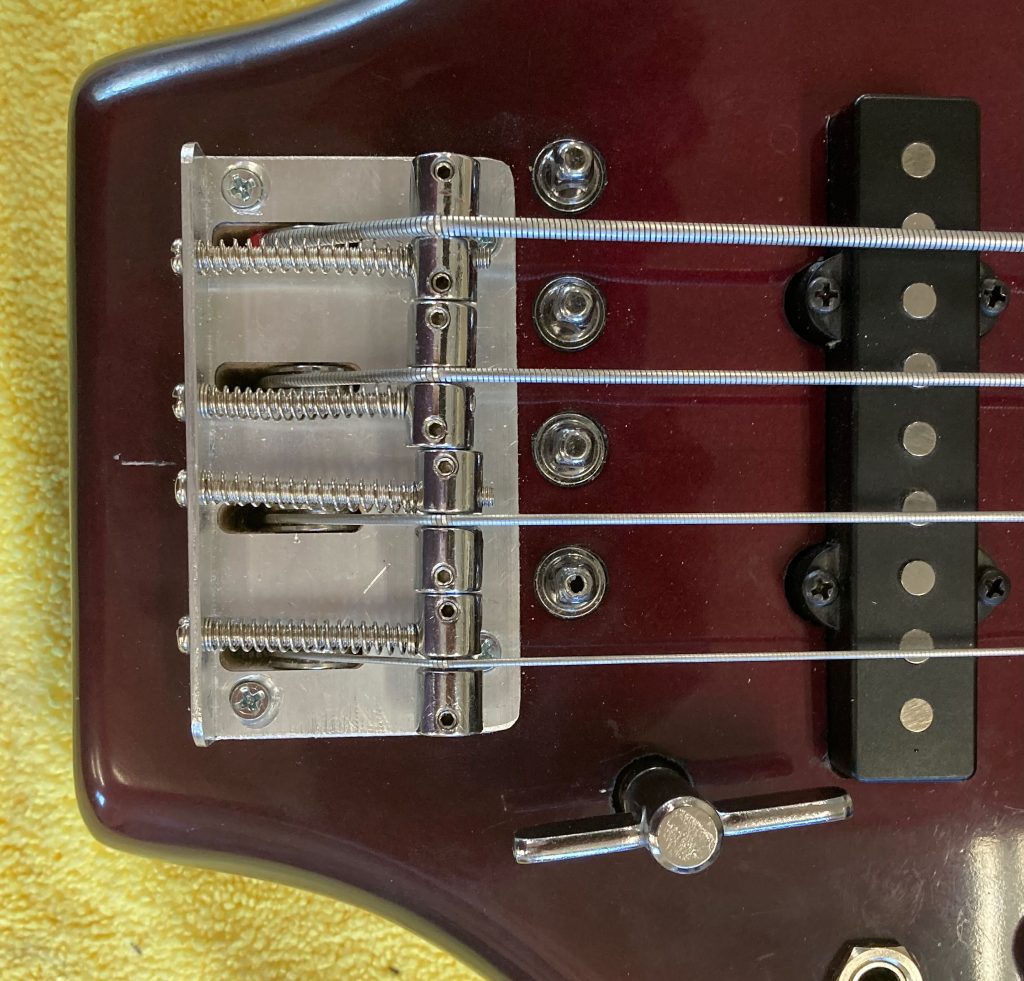
In order to create a bass as short as a Stratocaster, I need to eliminate the extra real estate that is normally necessary behind the bridge for the headless tuning assembly, so I designed and build a novel tuning assembly, shown above. The string are tuned using a magnetized drum key which is seen above in its built-in storage location. Because the key is removable, it is similar in tuning action to normal tuning keys on the headstock. Traditional headless tuning knobs need to be fairly small in diameter, as a result the tuning action can be less satisfying. I used standard bridge pieces from a Fender style bridge just to make things easy, but most bridge designs could be adapted. But notice that the break angle from the bridge pieces is more acute, much like a through the body string routing that is often considered superior to anchoring the string at the rear of the bridge.
Other non Ergo features:
Iluminated Side Markers
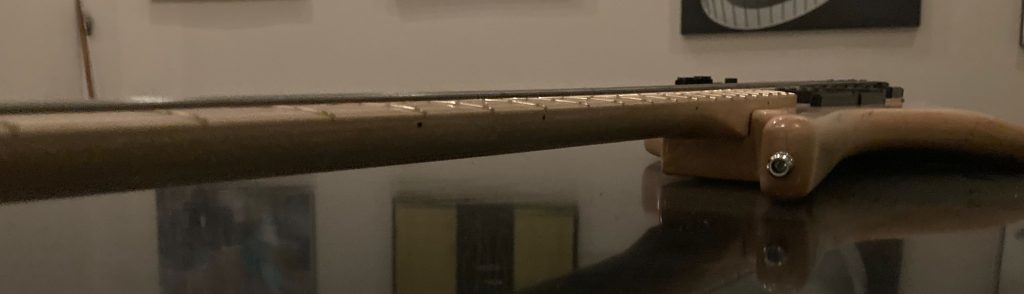
During Covid, I discovered that light colored necks with dark side markers are almost invisible at night outside. After researching solutions, I landed on fiber optic cable embedded in the neck, powered by one ultra low power LED in the body powered by a small battery. It works amazingly well. Here’s what the side dots look like in good light with the LED off:
But in dim light they are hard to see:
Until you turn on the LED in the body:
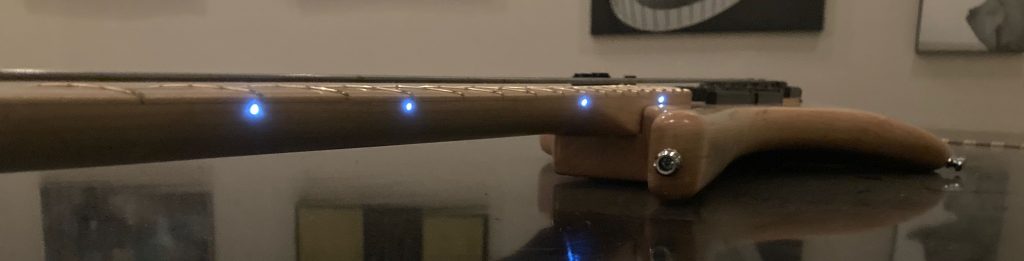
The blooming you see is camera artifact, as the side dots are very bright compared to the dim light. The intensity is adjustable via a knob on the body – this is full intensity. Even at this brightness, the current draw is negligible. The max intensity could be made much brighter, but I thought it would be too much.
Integrated Thumb Rest
Chris Finet suggested adding a thumb rest to simulate the side of the neck for upright players if wanting to make the upright playing position feel more like an upright. I had actually built such a thumb rest previously on a build from a few years ago, so I reworked the original Ergo bass to add an integral thumb rest. While I as at it, I did a little reshaping, which improves access to the neck right at the body.
Although it has been suggested that the thumb rest is a bad idea because it will work against the “floating thumb” technique, I think it actually is very consistent. It would only be used when playing the E string or A string, depending on muting technique (B or E on a five string). I see no downside
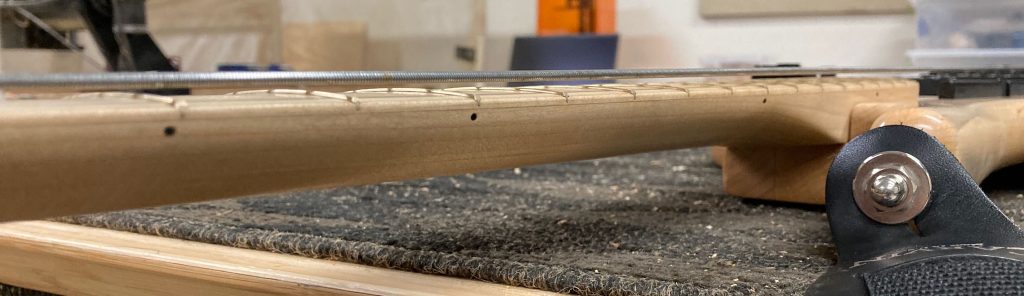
Laminated Neck
I take flat sawn stock (pretty much that is all you can buy these days), and cut it into slices, then reorient the grain and create a laminated stock for the neck. The result is the grain is then perpendicular to the string forces. This creates a stiffer and more stable neck, since the wood is twice as strong in the direction of the grain.
Non Jumbo Frets
I saw a Lee Sklar video on his most recorded bass. He mentioned using mandolin frets. I’ve always wondered “why jumbo frets?” on a lot of basses. So I’m using non-jumbo frets made of a slightly harder compound than nickel alloy for longer wear. And I remove the tangs from the frets and glue them in. This means that replacing the frets won’t result in tear out. You simply heat them up with an iron and pry them out.
Other Woods
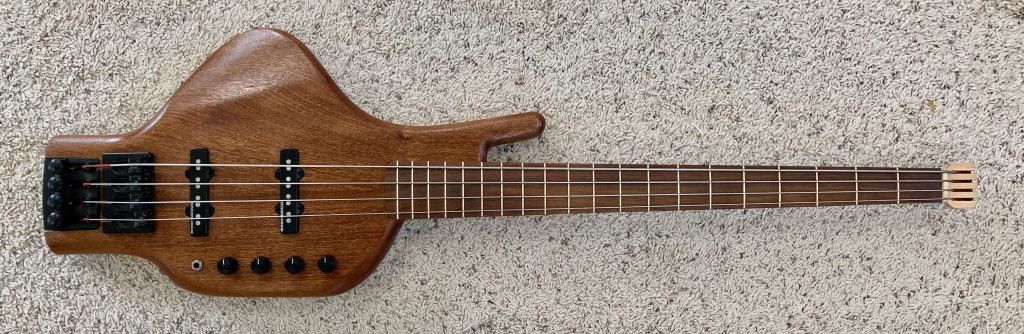
I’ve tended to work in maple because it is hard, strong, ecologically responsible, affordable, and sounds good. But it does lead to a monotone look, so I figured I better try some other woods to vary the visual appearance. Here is a later effort, with a Sapele body and Granadillo fretboard.
Ideas and features in the works
The following ideas and feature are under active development as we speak.
Low D Extension
Although I’ve got a 5 string bass, I’m not drawn to playing it. There is a trade off between neck width and string spacing, especially noticeable if one doesn’t have super long fingers, and I don’t. Also, I find the B string floppy. I don’t really miss having a low B or C, but I do frequently miss having a low D or Eb. So I am exploring similar ideas to what Kubicki pioneered in the 80s with the Ex Factor:
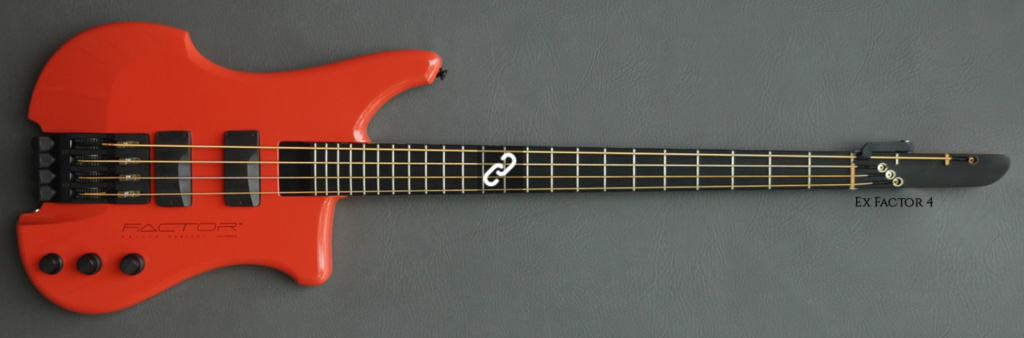
My approach to the body will be very different to the Kubicki pictured above, especially with regards to eliminating all that body behind the bridge and changing the playing position to resemble my Ergo body, but the Kubicki low D extension is extremely clever.
Carbon Truss Rod based on I Beam Theory
I’ve been using various forms of carbon reinforcement to increase stiffness and stability of the necks, including the use of carbon D-tubes. I also built a super lightweight traditional “compression rod” type of truss rod using a 1mm by 5mm carbon strip (it works!). But with what I’ve learned about I Beam Theory, I’ve prototyped a new design using a larger carbon rod that should actually stiffen the neck noticeably and increase stability as well. Normal truss rods do not do this to a noticeable extent, they merely counteract the bowing caused by string tension.
32″ Scale
I always sort of dismissed 32″ scale basses as being somehow non-serious or incapable of getting a classic Jazz Bass sound. But I recently was getting some input from Todd Johnson, and he said the first things he looks for in a bass is six strings and a 32″ scale. Although I’m not drawn to six string basses for a couple reasons, I was intrigued by the comment about 32″ scale basses, in part because I don’t have super long fingers, as mentioned above. If it works for a player like Todd Johnson, then I have to suspect that there is nothing second rate about a 32″ scale basses, especially because his six string has a low B! So I’ll be building a 32″ scale bass and exploring what it is like to play. I’m sure I’m not the only player out there that doesn’t have super long fingers.
Pickups, Electronics, DSP
I’ve wound my own low impedance pickups, built active preamps, and have a backlog of bass guitar oriented DSP ideas (Audio DSP has been a professional speciality). Originally I thought this would be my main focus as my time commitments opened up. But my enthusiasm for the success of the Ergo bass concept as I see it has distracted me for the time being. And there have been follow on ideas, as I’ve learned more about the shortcomings of traditional neck construction and the related opportunity for improvement. Eventually I hope to get back to this area of R&D and make more progress.
Custom Builds
I can build custom instruments for other players. But I can’t compete with mass produced instruments for conventional builds. And what would be the point? – there are so many reasonably priced instruments of good quality. So the purpose of a custom build is to create something that isn’t available because it is so different. This is the space I’m interested working in, regardless of what the differences are.